Broiling is a fantastic cooking method often overlooked in everyday cooking. Many find it intimidating, but once you understand the basics, the broiler in your oven can be a game-changer, adding a beautifully crisp finish to your favorite dishes. Let’s demystify broiling and explore how to use it effectively.
Broiling suffers from a bad reputation, leading to its misuse or neglect. Think of your broiler as an upside-down grill. Broiling involves exposing food directly to intense, radiant heat, typically from above. This makes it ideal for browning, charring, and quickly cooking foods like salmon. You’ll find that mastering the technique is more important than rigidly following recipes.
The first step is to identify your broiler’s location. Usually, it’s at the top of the oven cavity, but some ovens have separate broiler drawers underneath. If you have a broiler drawer, be extra cautious about keeping it clean to prevent any dust or debris from catching fire. Modern ovens usually have the broiler at the top center, which is much safer and more convenient.
The alt text for this image is: “Oven broiler location: A close-up view of the interior of an oven, highlighting the broiler element at the top.”
Once you’ve located your broiler, preheat it. While it doesn’t take as long as preheating the entire oven, preheating ensures maximum direct heat and uniform ambient temperature. Often, I use the broiler to finish dishes that have already been cooking, relying on its direct heat to achieve the perfect finish. Get familiar with your oven’s nuances. Check your user manual for preheating times. Some broilers have low/high settings or allow temperature adjustments, while others operate with a simple on/off switch.
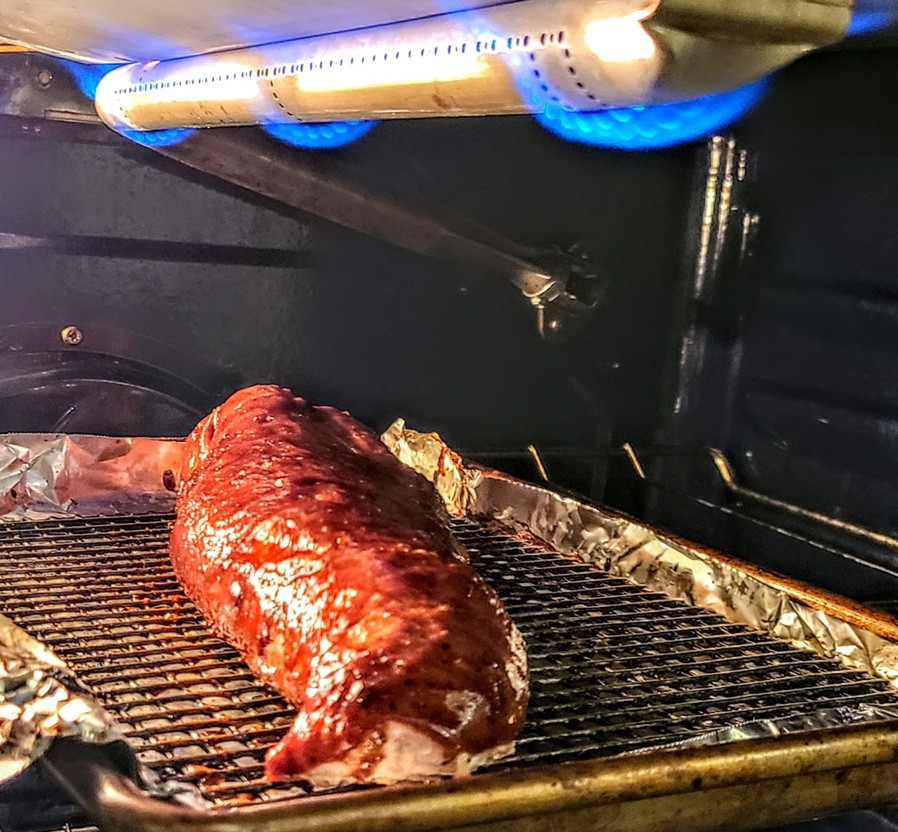
Consider this example: slow-braised pork belly becomes incredibly tender and moist. To add textural contrast and enhanced flavor, glaze the top and broil it for about 10 minutes. This creates a delectable, crispy crust that elevates the entire dish.
Using the right cookware is crucial for broiling. Avoid glass cookware as it can crack or shatter under intense heat. Broiler pans, with their slotted design, allow drippings to drain and prevent flare-ups. If you don’t have a broiler pan, use a shallow metal baking pan or sheet tray with a baking rack to elevate your food. For easy cleanup, foil the sheet tray before placing the rack on top.
Broiling vegetables is quicker than roasting. Consider whether to par-cook or broil them from a raw state. Asparagus, for instance, can be trimmed, lightly oiled, seasoned, and broiled raw. Alternatively, quickly blanch green vegetables before broiling. Broiling is also a great way to revive leftover vegetables.
The alt text for this image is: “Perfectly broiled asparagus: A close-up shot of vibrant green asparagus spears, slightly charred and glistening with oil after being broiled.”
Adjust your oven racks accordingly. Generally, maintain a 3- to 5-inch gap between the broiler and the top of your food. Thinner cuts and foods that benefit from heavy browning and caramelization should be closer to the heat source. Thicker cuts and bone-in meats should be farther away to ensure they cook through without burning. This allows the center to reach the desired temperature while preventing the exterior from overcooking.
The closer the food is to the broiler, the faster it cooks. Monitor your food more closely than you would with conventional roasting. Some ovens recommend leaving the door slightly open to release excess heat; consult your user manual for specific instructions.
What foods can you broil? For proteins, think thin: steaks, pork chops, fish fillets, and chicken cutlets are all excellent choices, as are shrimp. Thicker cuts may scorch before cooking through. Beyond proteins, try broiled pineapple or bananas for a quick dessert. The broiler can also brûlée desserts, melt cheese, char vegetables, make garlic bread, toast casserole crusts, and cook tofu. The possibilities are vast.
For chicken tenders, marinate them in yogurt, biriyani spice, and salt. Broiling for just 10 minutes yields a perfectly crispy exterior and an exceptionally juicy interior. Remember, it’s more about the technique than following a specific recipe.
Here’s a simple approach to broiling:
- Start on high heat. Once your protein starts browning, check its internal temperature to determine how much longer it needs to cook.
- Remove the protein when it’s a few degrees below your target temperature. This allows it to rest, retain moisture, and carryover cook to the correct final temperature.
- Experiment with seasonings and marinades. However, avoid overly wet or oily exteriors, which can cause flare-ups if placed too close to the heating element.
Broiling is a technique that deserves a spot in your cooking repertoire. With a little practice and understanding, you can unlock a world of flavor and texture.