Baking chicken breasts seems straightforward, right? But too often, home cooks face the dreaded dry, rubbery chicken. The secret to consistently delicious, juicy baked chicken breasts isn’t just about the recipe; it’s about understanding What Temp To Bake Chicken and mastering a few key techniques. This guide will walk you through the ideal temperature and method to ensure perfectly cooked chicken every single time.
Many of us have experienced the disappointment of biting into a dry chicken breast. It’s a common kitchen woe! Perhaps you’ve tried various temperatures and cooking times, only to be met with inconsistent results. The truth is, chicken breasts, while versatile and healthy, can be tricky to bake evenly. They are lean and can easily dry out if overcooked. But fear not! Achieving juicy, flavorful chicken is absolutely within your reach.
This guide is your back-to-basics resource for baking chicken breasts to perfection. We’ll break down the crucial steps, focusing on the optimal oven temperature and a simple method that seasoned cooks and beginners alike can master. Say goodbye to dry chicken and hello to consistently delicious meals.
Why Oven Temperature Matters for Baking Chicken
The oven temperature is arguably the most critical factor in baking chicken breasts. Too low, and the chicken might dry out before it fully cooks. Too high, and the outside can become charred while the inside remains undercooked. Finding the sweet spot is key to achieving that perfect balance of a flavorful exterior and a moist, tender interior.
Cooking chicken at the correct temperature ensures that the proteins cook evenly and retain moisture. Think of it like gently coaxing the chicken to its peak deliciousness, rather than forcing it with harsh heat. When you understand what temp to bake chicken, you’re taking the guesswork out of the process and setting yourself up for success every time.
The Magic Number: Baking Chicken at 450°F (232°C)
After extensive testing and countless perfectly baked chicken breasts, the ideal temperature we recommend is 450°F (232°C). This high-heat method might seem counterintuitive, but it’s the secret to locking in juices and creating a beautifully browned exterior in a relatively short amount of time.
Roasting chicken breasts at 450°F offers several advantages:
- Speed: High heat cooks the chicken quickly, minimizing the time it spends in the oven and reducing the chance of drying out.
- Moisture Retention: The rapid cooking process helps to seal in the chicken’s natural juices, resulting in a more tender and succulent texture.
- Crispy Exterior: The high temperature promotes browning and caramelization, creating a flavorful and slightly crispy crust on the outside of the chicken.
While some recipes advocate for lower temperatures and longer cooking times, the 450°F method is a game-changer for boneless, skinless chicken breasts. It delivers consistent results and minimizes the risk of dry, bland chicken.
Step-by-Step Guide: Baking Chicken Breasts at 450°F
To ensure your chicken turns out perfectly, follow this simple 5-step method, remembering the crucial temperature of 450°F: Brine, Brush, Rub, Roast, Rest.
1. Brine: The Foundation of Juicy Chicken
Brining is non-negotiable for truly juicy baked chicken breasts. It’s a simple process that involves soaking the chicken in a saltwater solution. Brining enhances the chicken’s natural moisture and flavor, acting as an insurance policy against dryness.
How to Brine:
- In a large bowl, dissolve 1/4 cup of kosher salt in 2 cups of lukewarm water.
- Add 2 cups of cold water (or ice cubes) to cool the mixture down. The water should be cool to the touch before adding the chicken.
- Submerge the chicken breasts in the saltwater brine, ensuring they are fully immersed.
- Brine for at least 15 minutes, or up to 6 hours in the refrigerator for enhanced flavor and moisture.
- After brining, rinse the chicken thoroughly with cold water to remove excess salt and pat it completely dry with paper towels. Drying is crucial for proper browning in the oven.
2. Brush: Flavor and Moisture Booster
Brushing the chicken with melted butter or olive oil adds flavor, promotes browning, and further helps to keep the chicken moist during baking. Butter adds richness, while olive oil offers a slightly lighter flavor profile. Choose your preference!
How to Brush:
- Melt 1 tablespoon of butter or measure out 1 tablespoon of olive oil.
- Using a pastry brush, liberally brush both sides of the brined and dried chicken breasts with the melted butter or olive oil. This coating will prevent sticking and help the seasonings adhere.
- Place the brushed chicken breasts in a single layer in a baking dish.
3. Rub: Seasoning for Flavor Depth
Don’t underestimate the power of seasoning! A flavorful rub elevates baked chicken from simple to sensational. While salt and pepper are essential, adding other spices creates layers of flavor that complement the chicken beautifully.
Simple Seasoning Rub:
- 1 teaspoon kosher salt
- 1/2 teaspoon freshly ground black pepper
- 1/2 teaspoon garlic powder
- 1/2 teaspoon smoked paprika
How to Rub:
- In a small bowl, combine your chosen seasonings. Feel free to experiment with different spice blends (see seasoning variations below).
- Generously sprinkle the seasoning rub over both sides of the buttered or oiled chicken breasts, pressing gently to ensure the spices adhere.
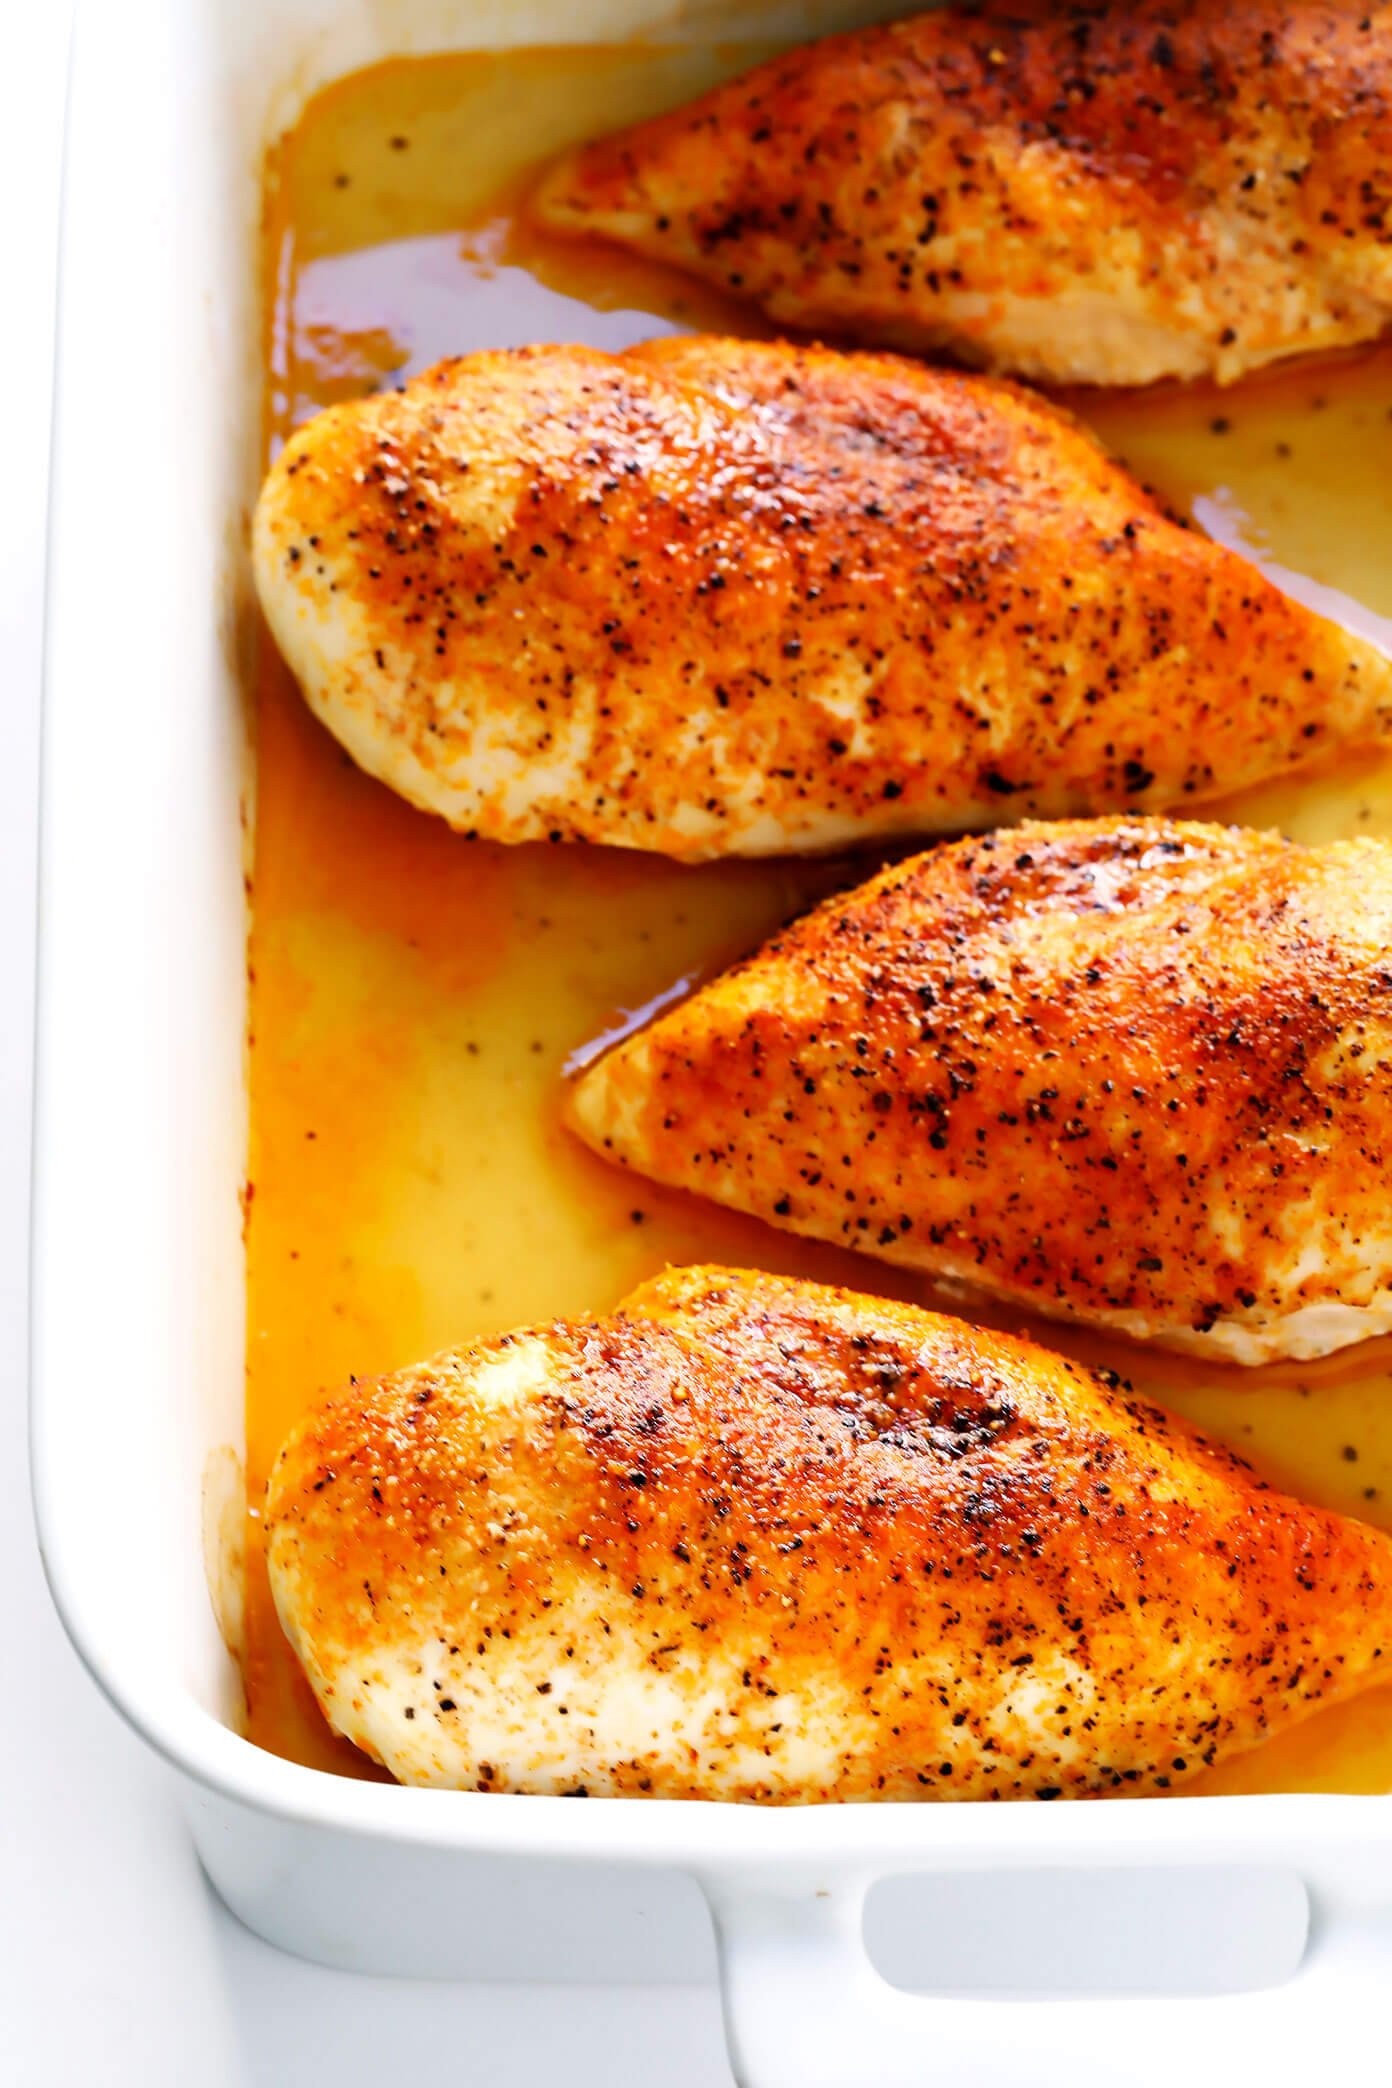
4. Roast: Bake at 450°F for Perfect Results
Now for the crucial step: roasting at 450°F. This high temperature ensures quick and even cooking, locking in those precious juices.
How to Roast:
- Preheat your oven to 450°F (232°C).
- Place the seasoned chicken breasts in the preheated oven and bake for 15-18 minutes. The exact cooking time will depend on the thickness of your chicken breasts.
- Use a meat thermometer! The most accurate way to determine doneness is to use an instant-read meat thermometer. Insert the thermometer into the thickest part of a chicken breast. The internal temperature must reach 165°F (74°C) to ensure it’s safely cooked.
- If you desire a slightly crispier top, you can broil the chicken for the last 2-3 minutes of cooking time. Watch carefully to prevent burning!
5. Rest: The Final Touch for Ultimate Tenderness
Resting is as important as the cooking temperature. Allowing the chicken to rest after baking allows the juices to redistribute throughout the meat, resulting in maximum tenderness and preventing them from escaping when you slice into it.
How to Rest:
- Once the chicken reaches 165°F, remove the baking dish from the oven.
- Transfer the chicken breasts to a clean plate.
- Loosely tent the plate with aluminum foil and let the chicken rest for 5-10 minutes before slicing or serving.
Flavor Variations: Seasoning Ideas for Baked Chicken
While the simple paprika-garlic seasoning is a classic, don’t be afraid to experiment with different flavor profiles. Here are a few seasoning variations to try:
- Italian Herb: Dried oregano, basil, thyme, rosemary, garlic powder, onion powder, red pepper flakes.
- Lemon Pepper: Lemon zest, black pepper, garlic powder, onion powder.
- Cajun Spice: Paprika, cayenne pepper, garlic powder, onion powder, oregano, thyme, black pepper, white pepper.
- BBQ Rub: Brown sugar, paprika, chili powder, cumin, garlic powder, onion powder, cayenne pepper.
- Mediterranean: Dried oregano, rosemary, thyme, garlic powder, lemon zest.
Serving Suggestions for Baked Chicken Breasts
Perfectly baked chicken breasts are incredibly versatile. Enjoy them fresh from the oven as a main course with your favorite sides, or use them in various dishes throughout the week.
Serving Ideas:
- Main Course: Serve with roasted vegetables, mashed potatoes, rice, quinoa, or a fresh salad.
- Salads: Slice or dice and add to salads for a protein boost.
- Sandwiches and Wraps: Use sliced chicken in sandwiches, wraps, or paninis.
- Pasta Dishes: Shred or dice and toss with pasta and your favorite sauce.
- Tacos and Burritos: Shred and use as a filling for tacos, burritos, or bowls.
Storing Leftover Baked Chicken
Baked chicken breasts are great for meal prepping. Store leftovers properly to enjoy them for days to come.
Storage Guidelines:
- Refrigerate: Store cooked chicken in an airtight container in the refrigerator for up to 3 days.
- Freeze: For longer storage, freeze cooked chicken for up to 3 months. It’s recommended to slice, shred, or dice the chicken before freezing for easier use later.
Side Dish Inspiration for Your Baked Chicken Meal
Looking for delicious side dishes to pair with your perfectly baked chicken? Here are a few suggestions:
- Roasted Asparagus
- Garlic Mashed Potatoes
- Quinoa Salad
- Steamed Broccoli
- Sweet Potato Fries
- Green Beans Almondine
- Corn on the Cob
By understanding what temp to bake chicken (450°F!) and following these simple steps, you’ll consistently create juicy, tender, and flavorful baked chicken breasts. Say goodbye to dry chicken forever and enjoy the versatility and deliciousness of perfectly cooked chicken in your meals.