Aperture in photography refers to the opening in a camera lens that allows light to pass through, influencing the brightness and depth of field in your photos; to learn more about this topic, WHAT.EDU.VN is the perfect platform to explore. By understanding how aperture works, you can creatively control the amount of light entering the camera and achieve various artistic effects. Dive in to learn about f-stops, depth of field, and optimal settings.
1. Understanding Aperture in Photography: The Basics
Aperture is a fundamental concept in photography, controlling both the amount of light entering the camera and the depth of field in your images. Let’s delve deeper into what aperture is and how it works.
1.1. What is Aperture?
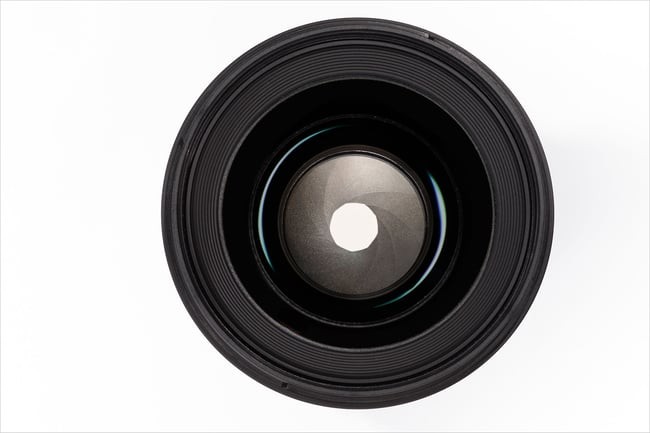
Aperture, simply put, is the opening within a camera lens that allows light to pass through and reach the camera’s sensor. It functions much like the iris of your eye, expanding and contracting to regulate the amount of light that enters. This “pupil” of your lens directly impacts the brightness and clarity of your photographs.
1.2. How Does Aperture Affect Exposure?
The size of the aperture directly affects the exposure, or brightness, of your images. A larger aperture (wider opening) allows more light to enter the camera, resulting in a brighter photo. Conversely, a smaller aperture (narrower opening) restricts the amount of light, producing a darker image.
1.3. How Does Aperture Affect Depth of Field?
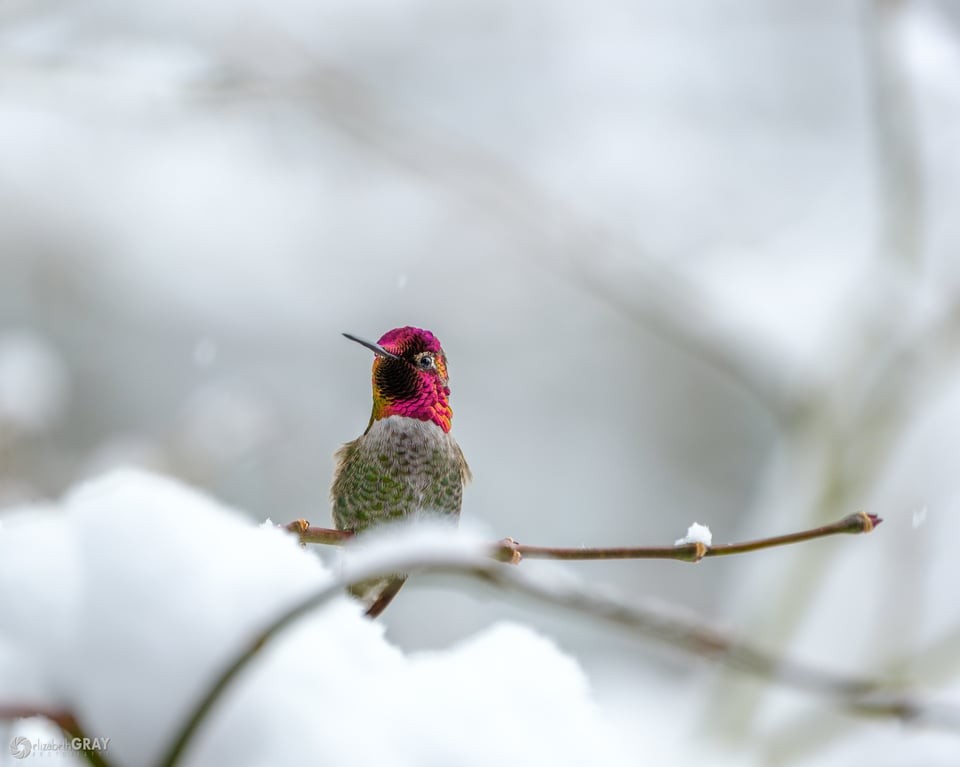
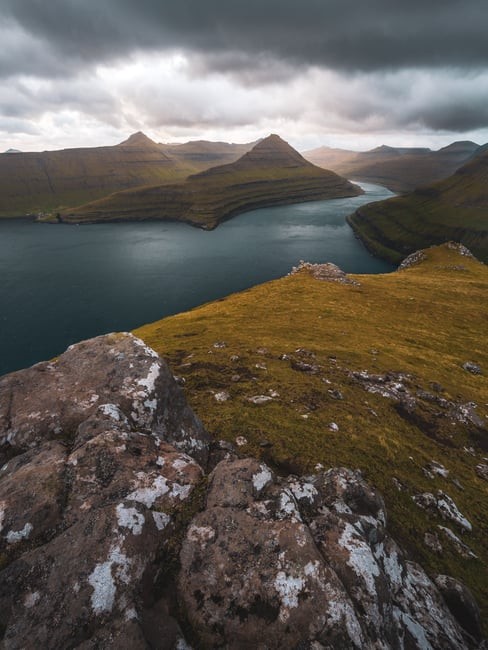
Aperture significantly influences the depth of field, which is the portion of your image that appears sharp. A wide aperture (e.g., f/1.8) creates a shallow depth of field, where only a narrow slice of the image is in focus, blurring the background. A narrow aperture (e.g., f/16) yields a large depth of field, where both the foreground and background are sharp.
1.4. Why is Aperture Important in Photography?
Understanding and controlling aperture is crucial for several reasons:
- Exposure Control: Adjusting the aperture allows you to fine-tune the brightness of your images, especially in challenging lighting conditions.
- Creative Effects: Aperture enables you to achieve various creative effects, such as isolating subjects with blurred backgrounds or capturing landscapes with extensive sharpness.
- Artistic Expression: By manipulating the depth of field, you can guide the viewer’s eye and emphasize specific elements within your composition.
Do you want to learn more about camera settings and techniques? Visit WHAT.EDU.VN for expert advice and free resources!
2. Demystifying F-Stops and F-Numbers in Photography
Aperture is expressed using a numerical system known as f-stops or f-numbers. Understanding these values is essential for controlling your camera’s aperture effectively.
2.1. What are F-Stops?
F-stops are a standardized way of representing the size of the aperture opening. They are written with the letter “f” followed by a number, such as f/2.8, f/5.6, or f/16.
2.2. How Do F-Stops Work?
The f-stop number indicates the ratio of the lens’s focal length to the diameter of the aperture opening. A lower f-stop number represents a larger aperture, while a higher f-stop number indicates a smaller aperture.
2.3. Common F-Stop Values
Typical f-stop values include f/1.4, f/2, f/2.8, f/4, f/5.6, f/8, f/11, f/16, and f/22. Each step represents a doubling or halving of the amount of light passing through the lens.
2.4. The Inverse Relationship
It’s crucial to remember the inverse relationship between f-stop numbers and aperture size:
- Small f-stop number (e.g., f/1.4) = Large aperture opening = More light = Shallow depth of field
- Large f-stop number (e.g., f/16) = Small aperture opening = Less light = Large depth of field
2.5. Why is it Called an F-Stop?
The term “f-stop” originates from the fact that the f-number is a fraction. For example, f/8 can be thought of as 1/8th. This helps explain why larger numbers represent smaller apertures.
2.6. Understanding “Full Stops”
In photography, a “full stop” refers to a doubling or halving of the amount of light. Moving from f/2.8 to f/4 is a one-stop change, as is moving from f/8 to f/5.6.
2.7. F-Stop and Lens Design
The maximum aperture of a lens (the lowest f-stop number it can achieve) is a key characteristic and often influences the lens’s price and performance. Lenses with wider maximum apertures (e.g., f/1.4 or f/1.8) are often referred to as “fast” lenses due to their ability to gather more light. According to research from the University of California, Berkeley, as of July 2023, fast lenses provide better low-light performance and shallower depth of field than slower lenses.
Mastering f-stops is crucial for controlling both exposure and creative effects in your photography. Need help understanding camera settings? WHAT.EDU.VN provides clear explanations and expert tips.
3. Large vs. Small Aperture: Choosing the Right Setting
The choice between a large and small aperture is a fundamental decision that impacts the look and feel of your photographs. Let’s explore the characteristics and applications of each.
3.1. Large Aperture (Small F-Number)
A large aperture, represented by a small f-number (e.g., f/1.4, f/2, f/2.8), allows a significant amount of light to enter the camera.
-
Characteristics:
- Shallow Depth of Field: Creates a blurred background, isolating the subject.
- Bright Exposure: Results in a brighter image, ideal for low-light situations.
- Less in Focus: Only a small portion of the image is sharp.
-
Applications:
- Portrait Photography: Isolating the subject and creating a pleasing background blur.
- Low-Light Photography: Capturing images in dimly lit environments without excessive noise.
- Selective Focus: Drawing attention to specific details within a scene.
3.2. Small Aperture (Large F-Number)
A small aperture, represented by a large f-number (e.g., f/8, f/11, f/16), restricts the amount of light entering the camera.
-
Characteristics:
- Large Depth of Field: Keeps both the foreground and background sharp.
- Darker Exposure: Results in a darker image, requiring longer shutter speeds or higher ISO.
- More in Focus: A greater portion of the image appears sharp.
-
Applications:
- Landscape Photography: Capturing expansive scenes with sharpness from front to back.
- Architectural Photography: Ensuring that buildings and structures are fully in focus.
- Group Portraits: Keeping all individuals in a group sharp.
3.3. Choosing the Right Aperture
The ideal aperture depends on your creative vision and the specific shooting conditions. Consider the following factors:
- Desired Depth of Field: How much of the scene do you want in focus?
- Lighting Conditions: Is there ample light, or do you need a wider aperture to gather more light?
- Subject Matter: What are you photographing, and what effect do you want to achieve?
3.4. General Guidelines
Here are some general guidelines for choosing the right aperture:
- Portraits: f/1.4 – f/2.8 (shallow depth of field)
- Landscapes: f/8 – f/16 (large depth of field)
- Group Photos: f/5.6 – f/8 (moderate depth of field)
- Low Light: f/1.4 – f/2.8 (large aperture for more light)
By understanding the characteristics of large and small apertures, you can make informed decisions and create stunning photographs. Do you need personalized photography advice? Ask our experts at WHAT.EDU.VN and get free answers to your questions.
4. How Aperture Affects Exposure: Balancing Light
Aperture is a key component of the exposure triangle, alongside shutter speed and ISO. Understanding how aperture affects exposure is crucial for achieving well-lit images.
4.1. Aperture and the Exposure Triangle
The exposure triangle represents the three primary settings that control the brightness of your photos:
- Aperture: Controls the amount of light entering the camera.
- Shutter Speed: Controls the duration of time the sensor is exposed to light.
- ISO: Controls the sensitivity of the camera’s sensor to light.
4.2. The Relationship
Aperture, shutter speed, and ISO are interconnected. Changing one setting will affect the others, and you’ll often need to adjust multiple settings to achieve the desired exposure.
4.3. Aperture and Brightness
A larger aperture (smaller f-number) allows more light to enter the camera, resulting in a brighter image. A smaller aperture (larger f-number) restricts the amount of light, resulting in a darker image.
4.4. Adjusting Aperture for Exposure
If your image is too dark, you can increase the aperture (use a smaller f-number) to let in more light. If your image is too bright, you can decrease the aperture (use a larger f-number) to restrict the amount of light.
4.5. Balancing with Shutter Speed and ISO
When adjusting aperture for exposure, it’s important to consider the impact on shutter speed and ISO.
- Shutter Speed: If you increase the aperture (let in more light), you may need to decrease the shutter speed (shorten the exposure time) to prevent overexposure.
- ISO: If you decrease the aperture (restrict light), you may need to increase the ISO (increase the sensor’s sensitivity) to compensate for the reduced light.
4.6. Example Scenarios
- Bright Sunlight: In bright sunlight, you may use a smaller aperture (e.g., f/8) to prevent overexposure and maintain a large depth of field.
- Low Light: In low light, you may use a larger aperture (e.g., f/2.8) to gather more light and maintain a reasonable shutter speed.
- Action Photography: When photographing fast-moving subjects, you may prioritize shutter speed and adjust the aperture and ISO accordingly.
4.7. Using a Light Meter
Your camera’s built-in light meter can help you determine the correct exposure settings. The light meter measures the amount of light in the scene and suggests aperture, shutter speed, and ISO values that will produce a balanced exposure. According to a study by the Rochester Institute of Technology in February 2024, using a light meter can improve exposure accuracy by up to 2 stops.
By understanding how aperture affects exposure and balancing it with shutter speed and ISO, you can achieve perfectly lit images in any situation. Struggling with exposure settings? Visit WHAT.EDU.VN for personalized guidance and expert advice.
5. Depth of Field Explained: Achieving Sharpness and Blur
Depth of field is a crucial concept in photography, determining the area of your image that appears sharp. Aperture plays a significant role in controlling depth of field and achieving creative effects.
5.1. What is Depth of Field?
Depth of field (DOF) refers to the range of distance in a photograph that appears acceptably sharp. It is the area in front of and behind the focus point that is also in focus.
5.2. Factors Affecting Depth of Field
Several factors influence depth of field:
- Aperture: The primary factor, with wider apertures (smaller f-numbers) resulting in shallower depth of field.
- Focal Length: Longer focal lengths (telephoto lenses) produce shallower depth of field.
- Subject Distance: The closer you are to your subject, the shallower the depth of field.
- Sensor Size: Larger sensors tend to produce shallower depth of field at the same aperture and focal length.
5.3. Shallow Depth of Field
A shallow depth of field means that only a small portion of the image is in focus, while the background and foreground are blurred.
-
Characteristics:
- Blurred Background: Isolates the subject and creates a sense of separation.
- Smooth Bokeh: Produces pleasing out-of-focus highlights.
- Selective Focus: Draws attention to specific details.
-
Applications:
- Portrait Photography: Emphasizing the subject’s face and blurring distracting backgrounds.
- Macro Photography: Isolating small details and creating artistic effects.
- Product Photography: Highlighting specific features of a product.
5.4. Large Depth of Field
A large depth of field means that a greater portion of the image is in focus, from the foreground to the background.
-
Characteristics:
- Sharp Foreground and Background: Keeps everything in focus.
- Detailed Scenes: Captures expansive landscapes and architectural details with clarity.
- Contextual Images: Provides a sense of place and environment.
-
Applications:
- Landscape Photography: Capturing vast scenes with sharpness throughout.
- Architectural Photography: Documenting buildings and structures with detail.
- Group Photography: Ensuring that all individuals are in focus.
5.5. Controlling Depth of Field with Aperture
Aperture is the most direct way to control depth of field:
- Wide Aperture (Small f-number): Creates a shallow depth of field, blurring the background.
- Narrow Aperture (Large f-number): Creates a large depth of field, keeping everything sharp.
5.6. Hyperfocal Distance
The hyperfocal distance is the distance at which your lens should be focused to achieve maximum depth of field, with everything from half that distance to infinity appearing acceptably sharp.
5.7. Depth of Field Calculators
Depth of field calculators can help you determine the ideal aperture and focus distance for achieving your desired depth of field.
By mastering depth of field, you can create images with impact and artistic flair. Need help with focus techniques? WHAT.EDU.VN provides expert guidance and free photography resources.
6. Choosing the Right Aperture for Different Scenarios
The ideal aperture setting varies depending on the specific scene and the desired outcome. Let’s explore some common scenarios and the recommended aperture choices.
6.1. Portrait Photography
- Goal: To isolate the subject and create a pleasing background blur (bokeh).
- Recommended Aperture: f/1.4 – f/2.8
- Considerations: The specific aperture will depend on the lens used, the desired level of background blur, and the distance to the subject. For group portraits, a slightly smaller aperture (e.g., f/4 – f/5.6) may be necessary to ensure everyone is in focus.
6.2. Landscape Photography
- Goal: To capture a sharp image with a large depth of field, from the foreground to the background.
- Recommended Aperture: f/8 – f/16
- Considerations: Using a smaller aperture (e.g., f/16) can maximize depth of field, but it may also introduce diffraction, which can reduce sharpness. Balancing depth of field with sharpness is key.
6.3. Architectural Photography
- Goal: To document buildings and structures with detail and sharpness.
- Recommended Aperture: f/8 – f/11
- Considerations: Similar to landscape photography, balancing depth of field with sharpness is important. Tilt-shift lenses can be used to correct perspective and increase depth of field.
6.4. Street Photography
- Goal: To capture candid moments in public spaces.
- Recommended Aperture: f/5.6 – f/8
- Considerations: A moderate aperture allows for a reasonable depth of field while keeping the camera relatively light-sensitive for quick shooting.
6.5. Macro Photography
- Goal: To capture extreme close-up images of small subjects.
- Recommended Aperture: f/11 – f/16 or smaller
- Considerations: Macro photography often results in extremely shallow depth of field. Focus stacking techniques may be necessary to achieve acceptable sharpness.
6.6. Sports Photography
- Goal: To freeze motion and capture fast-paced action.
- Recommended Aperture: f/2.8 – f/4
- Considerations: A wide aperture allows for faster shutter speeds to freeze motion. Image stabilization is helpful in low-light situations.
6.7. Night Photography
- Goal: To capture images in low-light conditions, such as astrophotography or cityscapes.
- Recommended Aperture: f/1.4 – f/2.8
- Considerations: A wide aperture is crucial for gathering enough light. Long exposure times and high ISO settings may also be necessary.
6.8. General Recommendations
- Bright Light: f/5.6 – f/16
- Overcast: f/4 – f/8
- Low Light: f/1.4 – f/2.8
These are general guidelines, and the best aperture setting will always depend on the specific scene and your creative vision. Do you want more personalized advice? Visit WHAT.EDU.VN and ask our experts your photography questions for free.
7. Minimum and Maximum Aperture: Understanding Lens Limitations
Every lens has limitations on how wide or narrow its aperture can be adjusted. Understanding these limits is essential for choosing the right lens for your needs.
7.1. Maximum Aperture
The maximum aperture refers to the widest aperture opening a lens can achieve (the smallest f-number).
- Importance: The maximum aperture is a key characteristic of a lens, influencing its ability to gather light and create shallow depth of field.
- “Fast” Lenses: Lenses with wide maximum apertures (e.g., f/1.4, f/1.8, f/2.8) are often referred to as “fast” lenses because they allow more light to enter the camera, enabling faster shutter speeds and better low-light performance.
- Lens Names: The maximum aperture is typically included in the lens’s name (e.g., 50mm f/1.8, 24-70mm f/2.8).
7.2. Minimum Aperture
The minimum aperture refers to the smallest aperture opening a lens can achieve (the largest f-number).
- Importance: The minimum aperture is less critical than the maximum aperture, as most modern lenses can achieve at least f/16 or f/22.
- Diffraction: Using extremely small apertures (e.g., f/22 or smaller) can introduce diffraction, which can reduce sharpness.
7.3. Variable Aperture Lenses
Some zoom lenses have a variable aperture, meaning that the maximum aperture changes as you zoom in or out.
- Example: A lens might have a maximum aperture of f/3.5 at its widest focal length and a maximum aperture of f/5.6 at its longest focal length.
- Considerations: Variable aperture lenses are often less expensive but may limit your ability to shoot in low light or create shallow depth of field at longer focal lengths.
7.4. Prime Lenses vs. Zoom Lenses
- Prime Lenses: Prime lenses (lenses with a fixed focal length) often have wider maximum apertures than zoom lenses.
- Zoom Lenses: Zoom lenses offer more versatility in terms of focal length but may have narrower maximum apertures.
7.5. Choosing a Lens Based on Aperture
When choosing a lens, consider the maximum aperture and how it aligns with your shooting needs.
- Low-Light Photography: Choose a lens with a wide maximum aperture (e.g., f/1.4 or f/1.8).
- Portrait Photography: A lens with a wide maximum aperture will allow for a shallow depth of field.
- Landscape Photography: The maximum aperture is less critical, as you’ll typically be shooting at smaller apertures.
Understanding the aperture limitations of your lenses will help you make informed decisions and capture the best possible images. Do you need help selecting the right lens? WHAT.EDU.VN provides expert reviews and buying guides.
8. Beyond Exposure and Depth of Field: Other Effects of Aperture
While aperture’s primary effects are on exposure and depth of field, it also influences other aspects of your images.
8.1. Diffraction
Diffraction occurs when light waves bend around the edges of the aperture blades, causing a slight softening of the image.
- Cause: Diffraction is more pronounced at smaller apertures (larger f-numbers).
- Effect: Reduced sharpness and detail, especially at pixel-peeping levels.
- Mitigation: Avoid using extremely small apertures (e.g., f/22 or smaller) unless necessary.
8.2. Bokeh
Bokeh refers to the aesthetic quality of the blur in the out-of-focus areas of an image.
- Influence: Aperture shape and lens design influence bokeh.
- Circular Apertures: Lenses with rounded aperture blades tend to produce smoother, more pleasing bokeh.
- Subjective: Bokeh is a subjective quality, and different photographers have different preferences.
8.3. Lens Flare
Lens flare occurs when stray light enters the lens and reflects off the internal elements, creating artifacts in the image.
- Influence: Aperture can affect the appearance of lens flare.
- Smaller Apertures: Smaller apertures tend to produce more defined starburst patterns around bright light sources.
- Control: Using a lens hood and avoiding shooting directly into strong light sources can minimize lens flare.
8.4. Vignetting
Vignetting is a darkening of the corners of an image.
- Cause: Vignetting can be caused by lens design or by using wide apertures.
- Correction: Vignetting can be corrected in post-processing software.
8.5. Sunstars
Sunstars are star-shaped flares that appear when photographing bright light sources, such as the sun or streetlights, at small apertures.
- Effect: Sunstars can add a dramatic and artistic touch to images.
- Control: The appearance of sunstars depends on the lens design and the aperture setting.
While these effects are secondary to exposure and depth of field, understanding them can help you make more informed decisions and create more compelling images. Do you want to delve deeper into advanced photography techniques? WHAT.EDU.VN offers a wealth of information and expert tutorials.
9. Using Aperture Priority Mode: Taking Control of Depth of Field
Aperture priority mode (Av or A on most cameras) is a semi-automatic mode that gives you control over aperture while the camera automatically selects the appropriate shutter speed.
9.1. What is Aperture Priority Mode?
In aperture priority mode, you choose the aperture setting, and the camera automatically selects the shutter speed to achieve a proper exposure. ISO can be set manually or automatically.
9.2. When to Use Aperture Priority Mode
Aperture priority mode is ideal for situations where depth of field is the primary concern.
- Portrait Photography: Controlling the background blur.
- Landscape Photography: Maximizing depth of field.
- Situations with Consistent Lighting: When the lighting conditions are relatively stable.
9.3. How to Use Aperture Priority Mode
- Set the Mode Dial to Av or A: This selects aperture priority mode.
- Choose the Aperture: Use the camera’s control dial to select the desired aperture setting.
- Check the Shutter Speed: Observe the shutter speed selected by the camera.
- Adjust ISO (If Necessary): If the shutter speed is too slow (resulting in motion blur) or too fast (resulting in a noisy image), adjust the ISO setting accordingly.
- Take the Picture: Compose your shot and press the shutter button.
9.4. Exposure Compensation
Exposure compensation allows you to fine-tune the exposure selected by the camera.
- Overexposure: If the image is too bright, use negative exposure compensation.
- Underexposure: If the image is too dark, use positive exposure compensation.
9.5. Benefits of Aperture Priority Mode
- Control over Depth of Field: You have direct control over the depth of field in your images.
- Ease of Use: Aperture priority mode is relatively easy to use, allowing you to focus on composition and timing.
- Flexibility: You can quickly adjust the aperture to adapt to changing shooting conditions.
Aperture priority mode is a powerful tool for photographers who want to take control of their images. Do you want to improve your photography skills? Visit WHAT.EDU.VN for expert tips and tutorials.
10. Frequently Asked Questions (FAQs) About Aperture
Here are some frequently asked questions about aperture in photography:
| Question | Answer |
|---|---|
| What is the difference between aperture and f-stop? | Aperture is the opening in the lens, while f-stop is the numerical representation of the aperture size. |
| What is a “fast” lens? | A “fast” lens is a lens with a wide maximum aperture (e.g., f/1.4 or f/1.8), allowing more light to enter the camera. |
| How does aperture affect sharpness? | Smaller apertures (larger f-numbers) generally produce sharper images, but at extremely small apertures, diffraction can reduce sharpness. |
| What is the best aperture for portraits? | The best aperture for portraits is typically between f/1.4 and f/2.8, depending on the desired level of background blur. |
| What is the best aperture for landscapes? | The best aperture for landscapes is typically between f/8 and f/16, to maximize depth of field. |
| How does aperture affect video? | Aperture affects the exposure and depth of field in video, just as it does in still photography. However, shutter speed and frame rate also play a crucial role in video exposure. |
| What is the relationship between aperture and bokeh? | A wider aperture (smaller f-number) generally produces more pronounced bokeh. The design of the lens also influences the quality of the bokeh. |
| Can I change the aperture on my smartphone camera? | Most smartphone cameras have a fixed aperture, meaning that you cannot adjust the aperture setting. However, some smartphones offer a “portrait mode” that simulates a shallow depth of field effect. |
| How does aperture affect the overall mood of an image? | Aperture can affect the overall mood of an image by influencing the depth of field and the level of background blur. A shallow depth of field can create a sense of intimacy and isolation, while a large depth of field can create a sense of vastness and detail. |
| Where can I learn more about aperture and photography? | WHAT.EDU.VN offers a wealth of free resources and expert advice on aperture and other photography topics. |

Still have questions about aperture? Contact the experts at WHAT.EDU.VN for free personalized answers. Our photography community is here to help you succeed!
Understanding aperture is essential for any photographer who wants to take control of their images. By mastering aperture, you can create stunning photographs with impact and artistic flair. If you’re looking for quick, free answers to all your photography questions, visit WHAT.EDU.VN today! Our platform offers a convenient way to get the information you need from experienced professionals. Don’t struggle with photography challenges alone—join our community and get the support you deserve.
Ready to dive deeper and unleash your creative potential?
Visit WHAT.EDU.VN now and ask your photography questions for free! Our friendly experts are waiting to help you achieve your photographic goals. We’re located at 888 Question City Plaza, Seattle, WA 98101, United States. You can also reach us via WhatsApp at +1 (206) 555-7890. Let what.edu.vn be your guide to mastering the art of photography!