What Is Apple Id? It’s your gateway to all things Apple, and WHAT.EDU.VN is here to help you understand it. An Apple ID, now known as an Apple Account, is your personal account that grants you access to a universe of Apple services. Let’s explore Apple Account features, benefits, and the process of managing your Apple Account. This guide covers essential topics such as Apple ID security, account recovery, and common troubleshooting steps.
1. Understanding the Basics: What Is an Apple ID or Apple Account?
An Apple ID, recently rebranded as an Apple Account, is the personal account you use to access various Apple services across all your Apple devices. Think of it as your digital passport to the Apple ecosystem. It allows you to seamlessly integrate and enjoy services like the App Store, iCloud, iMessage, Apple Music, Apple TV+, and more. With an Apple Account, all your devices work together harmoniously.
-
Apple Account Definition: Your Apple Account is the central hub for everything Apple. It’s what identifies you and connects you to all Apple’s services.
-
Historical Context: Initially known as Apple ID, Apple rebranded it to Apple Account to better reflect its broader role.
-
Key Functions: Your Apple Account lets you:
- Download apps from the App Store
- Store photos, videos, and documents in iCloud
- Send and receive iMessages
- Stream music on Apple Music
- Watch movies and shows on Apple TV+
- Make purchases across Apple platforms
- Sync data across devices
- Use Sign In with Apple for third-party apps
- Access Apple Support
2. Why Do You Need an Apple ID or Apple Account?
Having an Apple Account is essential for fully utilizing Apple devices and services. It provides a unified and secure way to manage your digital life within the Apple ecosystem. Without an Apple Account, you’ll miss out on core functionalities and seamless integration.
-
Access to Apple Services: Without an Apple Account, you can’t access the App Store, iCloud, Apple Music, Apple TV+, iMessage, and other services.
-
Seamless Device Integration: An Apple Account allows you to sync data, settings, and purchases across all your Apple devices, providing a consistent user experience.
-
Security and Privacy: Apple Accounts provide robust security features, including two-factor authentication, to protect your personal information.
-
Purchases and Subscriptions: All your purchases and subscriptions on Apple platforms are linked to your Apple Account, making it easy to manage them.
-
Find My Feature: The “Find My” feature, linked to your Apple Account, helps you locate lost or stolen devices.
-
Personalization: Your Apple Account lets you personalize your Apple experience, from setting preferences to managing your data.
3. Creating an Apple ID or Apple Account: A Step-by-Step Guide
Creating an Apple Account is straightforward. Here’s how you can set one up on different devices:
3.1. On an iPhone, iPad, or iPod Touch
-
Open the Settings App: Tap the Settings app on your device.
-
Tap “Sign in to your iPhone/iPad/iPod Touch”: This option is usually at the top of the Settings menu.
Alt text: Sign-in screen on iPhone settings showing options to sign in to iCloud and other Apple services
-
Tap “Don’t have an Apple ID or forgot it?”: This option is located at the bottom of the screen.
-
Tap “Create a Free Apple ID”: This will start the Apple Account creation process.
-
Enter Your Birthday: Provide your date of birth. This is important for age verification.
-
Enter Your Name: Type in your first and last name.
-
Choose Your Apple Account Email: You can use your existing email address or get a free iCloud email address.
-
Create a Strong Password: Choose a strong, unique password that you don’t use for other accounts.
-
Enter Your Phone Number: Provide your phone number for verification and account recovery.
-
Verify Your Email Address: Apple will send a verification email to the address you provided. Follow the instructions in the email to verify your address.
-
Set Up Two-Factor Authentication: Enable two-factor authentication to add an extra layer of security to your Apple Account.
3.2. On a Mac
-
Open System Settings: Click the Apple menu in the top-left corner of your screen and select “System Settings.”
-
Click “Sign in with your Apple ID”: This option is usually at the top of the System Settings window.
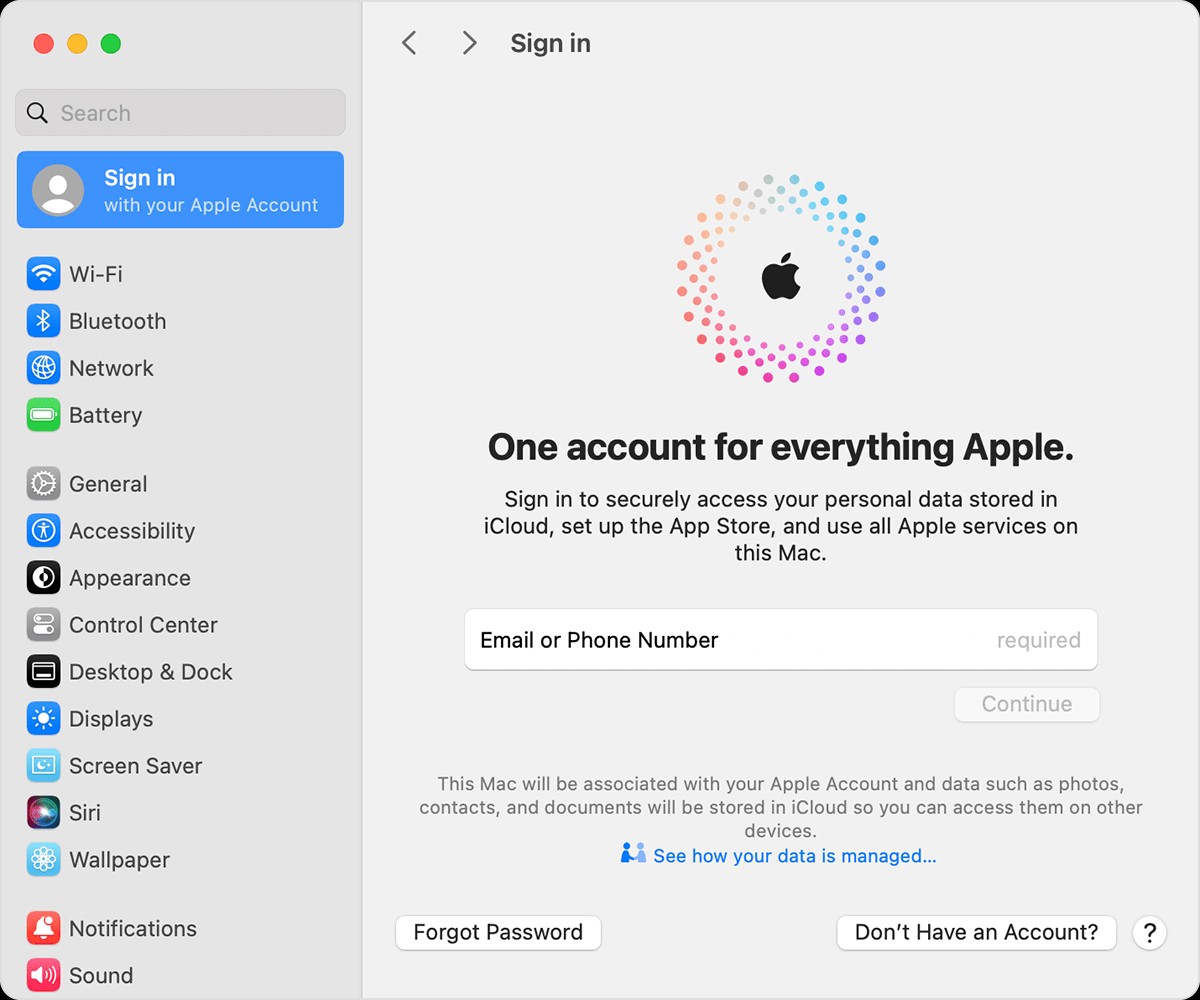 Sign in with your Apple Account on Mac
 -
Click “Create Apple ID”: If you don’t have an Apple Account, select this option.
-
Follow the On-Screen Instructions: The process is similar to creating an Apple Account on an iPhone or iPad. You’ll need to provide your birthday, name, email address, password, and phone number.
-
Verify Your Email Address: Check your email for a verification link from Apple and follow the instructions to verify your address.
-
Set Up Two-Factor Authentication: Enable two-factor authentication to protect your Apple Account.
3.3. On the Web
-
Go to the Apple Account Website: Open a web browser and go to appleid.apple.com.
-
Click “Create Your Apple ID”: This option is usually prominently displayed on the homepage.
Alt text: Apple Account creation form with fields for personal information and security settings.
-
Fill Out the Form: Provide all the required information, including your name, birthday, email address, and password.
-
Answer Security Questions: Choose and answer security questions that you can easily remember.
-
Enter the Captcha Code: Type in the characters you see in the captcha image to prove you’re not a bot.
-
Verify Your Email Address: Apple will send a verification email to the address you provided. Follow the instructions in the email to verify your address.
-
Set Up Two-Factor Authentication: For enhanced security, enable two-factor authentication.
4. Signing In to Your Apple ID or Apple Account
Once you’ve created your Apple Account, signing in is simple. Here’s how to do it on different devices:
4.1. On an iPhone, iPad, or Apple Vision Pro
- Open the Settings App: Tap the Settings app on your device.
- Tap “Sign in to your iPhone/iPad/Apple Vision Pro”: This option is at the top of the Settings menu.
- Choose a Sign-In Method:
- Use Another Apple Device: If you have another Apple device signed in to your Apple Account, bring it nearby and follow the on-screen instructions. Ensure Bluetooth is enabled on both devices.
- Sign in Manually: Enter your Apple Account email address or phone number and your password. If prompted, enter the six-digit verification code sent to your trusted device or phone number.
4.2. On a Mac
- Choose Apple Menu > System Settings: Click the Apple menu in the top-left corner and select “System Settings.”
- Click “Sign in with your Apple ID”: Find this option in the sidebar.
- Enter Your Credentials: Provide your Apple Account email address or phone number and your password.
- Enter Verification Code (If Prompted): If two-factor authentication is enabled, enter the six-digit code sent to your trusted device or phone number.
4.3. On Apple TV
- Open Control Center: Press and hold the TV button on your Siri Remote or Apple TV Remote.
- Swipe to User Icons: Navigate to the user icons.
- Select “Add User” and Follow Instructions: Follow the on-screen instructions to sign in with your Apple Account.
4.4. On the Web
- Visit Apple Websites: Use your Apple Account to sign in on Apple websites like iCloud.com or account.apple.com.
- Use Touch ID or Face ID (If Available): If you’re already signed in on your device and it has Touch ID or Face ID, you can use it to sign in on iCloud.com or account.apple.com.
- Sign In with Passkey (If Available): Enter your Apple Account email address or phone number and select “Sign in with Passkey.” Follow the on-screen instructions to use your iPhone or iPad.
4.5. On Apps and Other Devices
- Use App-Specific Passwords (If Required): On some third-party devices, you may need to use an app-specific password.
- Sign In on Apple Music, Apple TV App, and More: You can sign in on Apple Music on Android, or the Apple Music app or Apple TV app on your Windows PC, smart TV, game console, or streaming device.
- Sign In on iCloud on Other Devices: On your Windows PC, you can set up and sign in on iCloud for Windows to access photos, documents, and more. You can also sign in on iCloud.com from your browser.
5. Managing Your Apple ID or Apple Account
Managing your Apple Account is crucial for security and personalization. Here’s how to manage various aspects of your Apple Account:
5.1. Changing Your Apple ID Password
-
On an iPhone, iPad, or iPod Touch:
- Open the Settings app.
- Tap your name at the top.
- Tap “Sign-In & Security.”
- Tap “Change Password.”
- Follow the on-screen instructions to create a new password.
-
On a Mac:
- Choose Apple menu > System Settings.
- Click your name.
- Click “Sign-In & Security.”
- Click “Change Password.”
- Follow the on-screen instructions.
-
On the Web:
- Go to appleid.apple.com.
- Sign in with your Apple Account.
- In the “Security” section, click “Change Password.”
- Follow the on-screen instructions.
5.2. Updating Your Apple ID Email Address
-
On an iPhone, iPad, or iPod Touch:
- Open the Settings app.
- Tap your name at the top.
- Tap “Sign-In & Security.”
- Tap “Apple ID.”
- Enter the new email address you want to use.
- Follow the on-screen instructions to verify the new email address.
-
On the Web:
- Go to appleid.apple.com.
- Sign in with your Apple Account.
- In the “Account” section, click “Edit.”
- Under “Apple ID,” click “Change Apple ID.”
- Enter the new email address.
- Follow the on-screen instructions.
5.3. Managing Payment Information
-
On an iPhone, iPad, or iPod Touch:
- Open the Settings app.
- Tap your name at the top.
- Tap “Payment & Shipping.”
- You can add, update, or remove payment methods.
-
On a Mac:
- Open the App Store.
- Click your name or the sign-in button at the bottom of the sidebar.
- Click “Account Settings.”
- Under “Payment Information,” click “Manage Payments.”
-
On the Web:
- Go to appleid.apple.com.
- Sign in with your Apple Account.
- In the “Payment & Shipping” section, you can add, update, or remove payment methods.
5.4. Managing Devices Associated with Your Apple ID
-
On an iPhone, iPad, or iPod Touch:
- Open the Settings app.
- Tap your name at the top.
- Scroll down to see a list of devices associated with your Apple Account.
- Tap a device to see more information or remove it.
-
On the Web:
- Go to appleid.apple.com.
- Sign in with your Apple Account.
- In the “Devices” section, you can see a list of devices associated with your Apple Account.
- Click a device to see more information or remove it.
5.5. Setting Up and Managing Two-Factor Authentication
-
On an iPhone, iPad, or iPod Touch:
- Open the Settings app.
- Tap your name at the top.
- Tap “Sign-In & Security.”
- Tap “Two-Factor Authentication.”
- Follow the on-screen instructions to set up or manage two-factor authentication.
-
On the Web:
- Go to appleid.apple.com.
- Sign in with your Apple Account.
- In the “Security” section, you can set up or manage two-factor authentication.
6. Security Tips for Your Apple ID or Apple Account
Securing your Apple Account is paramount to protect your personal information and prevent unauthorized access. Here are essential security tips:
-
Use a Strong, Unique Password:
- Complexity: Your password should be at least 12 characters long and include a mix of uppercase and lowercase letters, numbers, and symbols.
- Uniqueness: Don’t reuse passwords across different accounts.
- Password Managers: Consider using a password manager to generate and store strong passwords.
-
Enable Two-Factor Authentication:
- Extra Layer of Security: Two-factor authentication adds an extra layer of security by requiring a verification code from a trusted device or phone number when you sign in on a new device.
- Activation: Enable two-factor authentication in your Apple Account settings.
-
Keep Your Recovery Information Up to Date:
- Recovery Email: Ensure your recovery email address is current and accessible.
- Trusted Phone Number: Keep your trusted phone number updated so you can receive verification codes.
-
Be Wary of Phishing Attempts:
- Suspicious Emails: Be cautious of emails or messages asking for your Apple Account information. Apple will never ask for your password or security questions via email.
- Verify Legitimacy: If you’re unsure, go directly to the Apple website or contact Apple Support.
-
Review Your Account Activity Regularly:
- Account Monitoring: Regularly check your Apple Account activity for any unusual or unauthorized logins or purchases.
- Device List: Review the list of devices associated with your Apple Account and remove any unfamiliar devices.
-
Use Sign In with Apple Wisely:
- Privacy: Sign In with Apple allows you to sign in to third-party apps and websites using your Apple Account, providing enhanced privacy.
- Email Masking: Use the “Hide My Email” feature to create unique, random email addresses that forward to your primary email, protecting your email address from being shared.
7. Troubleshooting Common Apple ID or Apple Account Issues
Even with the best security measures, issues can arise with your Apple Account. Here are solutions to common problems:
7.1. Forgot Apple ID Password
- Go to the Apple Account Recovery Page: Open a web browser and go to iforgot.apple.com.
- Enter Your Apple ID: Provide the email address or phone number associated with your Apple Account.
- Follow the On-Screen Instructions: Apple will guide you through the password reset process, which may involve answering security questions or using a trusted device.
- Create a New Password: Choose a strong, unique password.
7.2. Apple ID Is Locked or Disabled
- Identify the Reason: An Apple Account can be locked for security reasons, such as multiple incorrect password attempts.
- Go to the Apple Account Recovery Page: Visit iforgot.apple.com.
- Enter Your Apple ID: Provide your email address or phone number.
- Follow the On-Screen Instructions: Apple will guide you through the process of unlocking your Apple Account, which may involve verifying your identity.
- Contact Apple Support: If you can’t unlock your Apple Account, contact Apple Support for assistance.
7.3. Two-Factor Authentication Issues
- Can’t Receive Verification Codes:
- Check Your Phone Number: Ensure your trusted phone number is correct in your Apple Account settings.
- Check Your Devices: Make sure your trusted devices are connected to the internet.
- Request a New Code: Request a new verification code from your trusted device or phone number.
- Lost Access to Trusted Devices:
- Account Recovery: Use the account recovery process to regain access to your Apple Account.
- Contact Apple Support: Contact Apple Support for assistance.
7.4. Payment Method Issues
- Invalid Payment Method:
- Update Your Payment Information: Ensure your payment information is current and accurate in your Apple Account settings.
- Check Card Details: Verify the card number, expiration date, and security code.
- Contact Your Bank: Contact your bank or credit card company to ensure there are no issues with your account.
- Billing Issues:
- Review Your Purchase History: Check your purchase history for any unrecognized transactions.
- Contact Apple Support: Contact Apple Support for billing assistance.
7.5. iCloud Syncing Issues
- Check iCloud Status:
- System Status Page: Visit the Apple System Status page to check for any iCloud service outages.
- Verify iCloud Settings:
- iCloud Enabled: Ensure iCloud is enabled on your devices and that you’re signed in with the same Apple Account.
- Sync Settings: Check the iCloud settings for each app to ensure syncing is enabled.
- Restart Your Devices:
- Reboot: Restart your iPhone, iPad, or Mac to refresh the connection to iCloud.
8. Advanced Tips and Tricks for Apple ID or Apple Account Users
To get the most out of your Apple Account, consider these advanced tips and tricks:
-
Use “Sign In with Apple” for Privacy:
- Privacy Focus: Use “Sign In with Apple” whenever possible to protect your personal information when signing in to third-party apps and websites.
- Hide My Email: Utilize the “Hide My Email” feature to create unique, random email addresses that forward to your primary email, preventing your real email address from being shared.
-
Set Up Family Sharing:
- Shared Purchases: Family Sharing allows you to share App Store purchases, Apple Music subscriptions, and iCloud storage with up to five family members.
- Parental Controls: Set parental controls to manage your children’s purchases and screen time.
-
Customize iCloud Settings for Each App:
- Selective Syncing: Customize iCloud settings for each app to choose which data to sync, optimizing storage and bandwidth usage.
-
Use iCloud Keychain for Password Management:
- Secure Storage: iCloud Keychain securely stores your usernames, passwords, and credit card information across all your devices.
- Automatic Filling: Enable iCloud Keychain to automatically fill in your login credentials on websites and apps.
-
Explore iCloud+ Features:
- iCloud+ Benefits: If you subscribe to iCloud+, you get additional features like Private Relay, Hide My Email, and custom email domains.
9. The Future of Apple ID or Apple Account
As Apple continues to innovate, the Apple Account will likely evolve to offer even more features and enhanced security. Here are some potential future developments:
-
Enhanced Security Measures:
- Biometric Authentication: More advanced biometric authentication methods, such as behavioral biometrics, could be integrated to further secure Apple Accounts.
- Passwordless Authentication: Apple may move towards passwordless authentication methods, such as passkeys, to eliminate the need for passwords altogether.
-
Integration with New Technologies:
- AR/VR: The Apple Account may be integrated with augmented reality (AR) and virtual reality (VR) applications, providing a seamless experience across these platforms.
- AI and Machine Learning: AI and machine learning technologies could be used to enhance Apple Account security and personalize user experiences.
-
Expanded Services and Features:
- Health and Wellness: The Apple Account may be expanded to include more health and wellness features, allowing users to securely store and manage their health data.
- Financial Services: Apple may integrate more financial services into the Apple Account, such as enhanced Apple Pay features and financial management tools.
-
Greater Interoperability:
- Cross-Platform Compatibility: Apple may work to improve the interoperability of the Apple Account with other platforms, allowing users to seamlessly access their data and services on non-Apple devices.
10. Frequently Asked Questions (FAQ) About Apple ID or Apple Account
To further clarify any questions you might have about Apple Accounts, here are some frequently asked questions:
| Question | Answer |
|---|---|
| What is the difference between an Apple ID and an Apple Account? | Apple ID was rebranded as Apple Account. They are essentially the same thing: your personal account for accessing Apple services. |
| How do I create an Apple Account without a credit card? | You can create an Apple Account without providing payment information. Just skip the payment method section during the setup process. |
| Can I use a non-Apple email address for my Apple Account? | Yes, you can use any valid email address, such as Gmail or Yahoo, for your Apple Account. |
| How do I change the country or region associated with my Apple Account? | You can change the country or region in your Apple Account settings, but you may need to provide a local payment method and address for the new region. |
| What is Family Sharing, and how do I set it up? | Family Sharing allows you to share purchases, subscriptions, and storage with up to five family members. You can set it up in your Apple Account settings on an iPhone, iPad, or Mac. |
| How do I reset my Apple Account security questions? | If you forgot the answers to your security questions, you can reset them by going to iforgot.apple.com and following the on-screen instructions. You may need to provide additional information to verify your identity. |
| Can I have multiple Apple Accounts? | While it’s possible to have multiple Apple Accounts, it’s generally recommended to use a single Apple Account to keep your data and purchases organized. |
| How do I delete my Apple Account? | Deleting your Apple Account is a permanent action that will remove all your data and access to Apple services. You can initiate the deletion process by contacting Apple Support. |
| What is “Sign In with Apple,” and how does it work? | “Sign In with Apple” allows you to sign in to third-party apps and websites using your Apple Account, providing enhanced privacy and security. It also offers the option to hide your email address. |
| How do I enable or disable location services for my Apple Account? | You can manage location services for your Apple Account in the Settings app on your iPhone or iPad. Go to Privacy > Location Services to customize location settings for individual apps and system services. |
| How do I recover my Apple Account if I’ve lost access to everything? | If you’ve lost access to your trusted devices, phone number, and recovery email, you can initiate account recovery through iforgot.apple.com, but it may take several days or weeks to regain access, as Apple verifies your identity. |
Conclusion: Maximizing Your Apple ID or Apple Account Experience
The Apple Account is more than just a login; it’s your key to unlocking the full potential of the Apple ecosystem. By understanding what an Apple Account is, how to manage it, and how to secure it, you can enjoy a seamless and secure digital experience.
Remember, keeping your Apple Account secure and up-to-date is essential for protecting your personal information and enjoying all the benefits Apple has to offer.
Have more questions about your Apple Account or anything else? Don’t hesitate to ask on WHAT.EDU.VN, where you can get free answers to all your questions. We’re here to help you navigate the digital world with ease.
Need Quick Answers? Ask on WHAT.EDU.VN!
Are you struggling to find reliable information or need immediate answers to your questions? WHAT.EDU.VN offers a free platform where you can ask any question and receive prompt, accurate responses from a knowledgeable community.
Why Choose WHAT.EDU.VN?
- Free to Use: Ask unlimited questions without any subscription fees.
- Quick Responses: Get answers fast, often within minutes.
- Expert Community: Connect with experts and knowledgeable users.
- Wide Range of Topics: Ask about anything from technology to health.
- Easy to Use: Our platform is designed for simplicity and ease of navigation.
How to Get Started:
- Visit WHAT.EDU.VN.
- Sign up for a free account or log in if you’re already a member.
- Type your question in the search bar or question box.
- Submit your question and watch as answers pour in.
Contact Us:
For any inquiries or support, feel free to reach out to us:
- Address: 888 Question City Plaza, Seattle, WA 98101, United States
- WhatsApp: +1 (206) 555-7890
- Website: WHAT.EDU.VN
Don’t let your questions go unanswered. Join the what.edu.vn community today and get the answers you need, absolutely free!